DEX is a decentralized exchange integrated into the Cellframe Wallet. You can also interact with XCHANGE service using SRV_XCHANGE. Node Commands.
The DEX’s primary function is to facilitate token swaps within the Cellframe ecosystem networks.
Currently, approximately 15 different tokens (CELL, KEL, DAI, etc.) have been declared within the networks. As of now, the exchanger does not offer the ability to purchase CELL/KEL tokens, but they can be transferred from other networks using the Cellframe Bridge.
Additionally, the exchange displays currently active orders and the depth of market for token pairs.
How to use
- Download the last update of the Cellframe Wallet for your OS
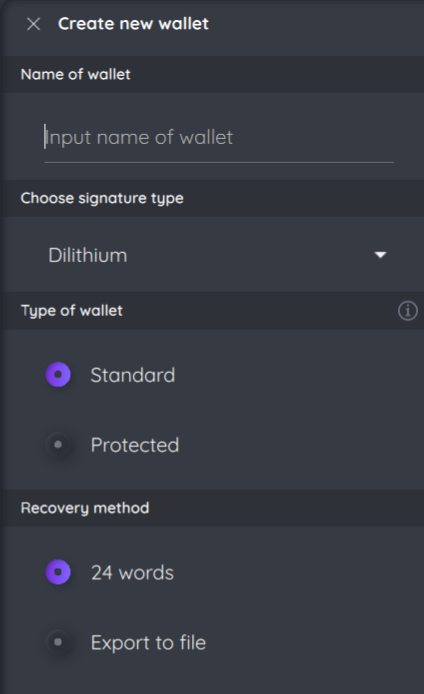
- Create wallet (enter “Wallet” tab)
A wallet can either be imported or created. When creating a new wallet, the user can select the signature type (Dilithium or Falcon), wallet type (Standard or Protected), and the future recovery method (from file or via 24 words). If a wallet has “protected” type, the system will prompt for a password (which will be used for certain functions).
- Put tokens on your wallet
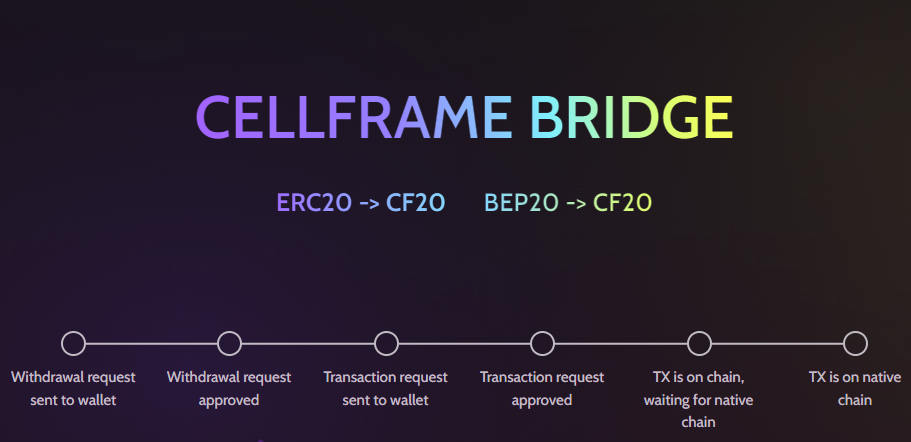
Tokens can be transferred into our networks via bridges: ERC20 → CF20 or BEP20 → CF20.
https://bridge.cellframe.net/ - official Cellframe Bridge site
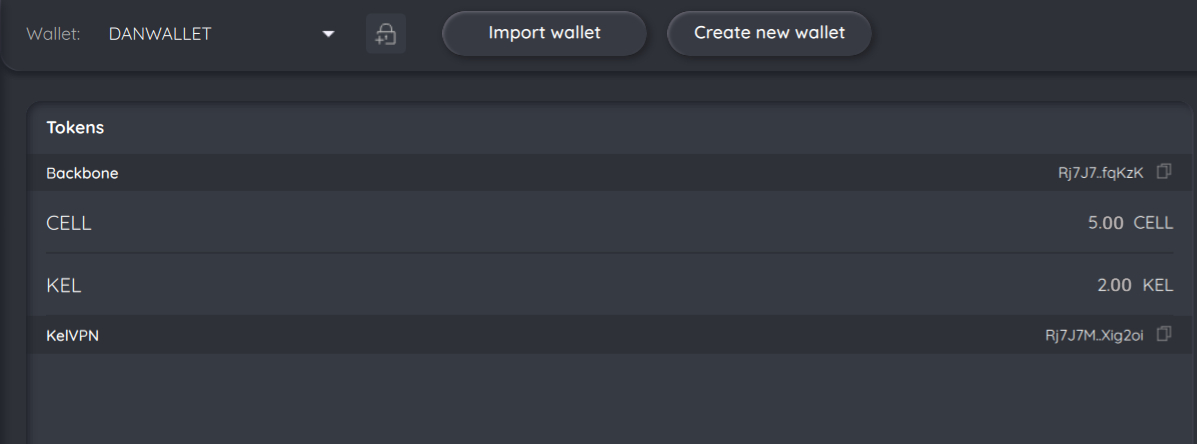
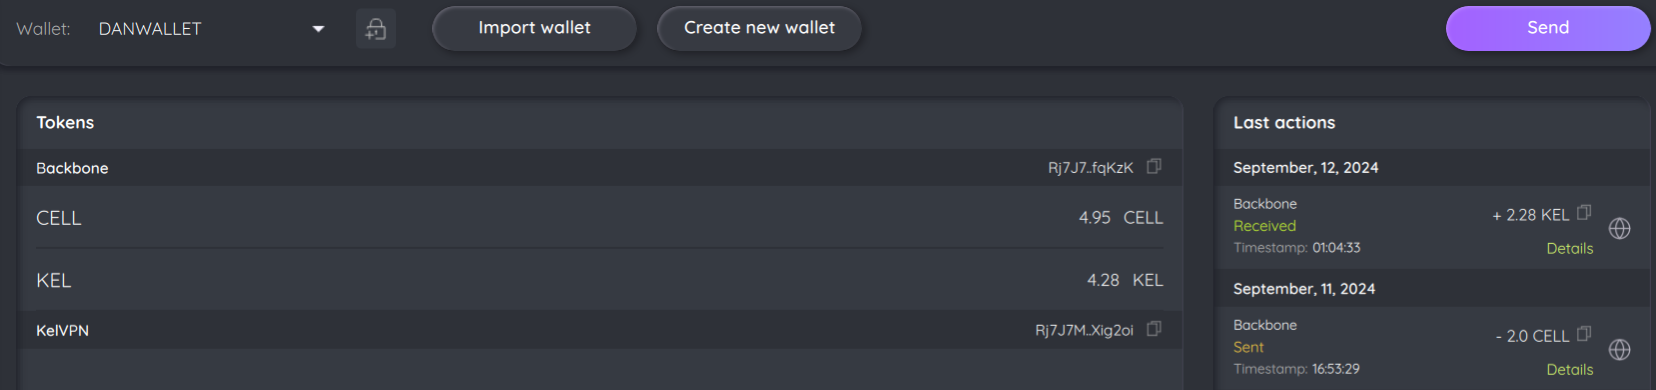
The tokens stored in your wallet will be displayed on the “Wallet” tab. You will be able to see which token is stored in which network, as well as the wallet address in that specific network.
For example, in the image below, you can see that there are 5 CELL tokens and 2 KEL tokens in the Backbone network, while there are no tokens in the KelVPN network for this particular wallet.
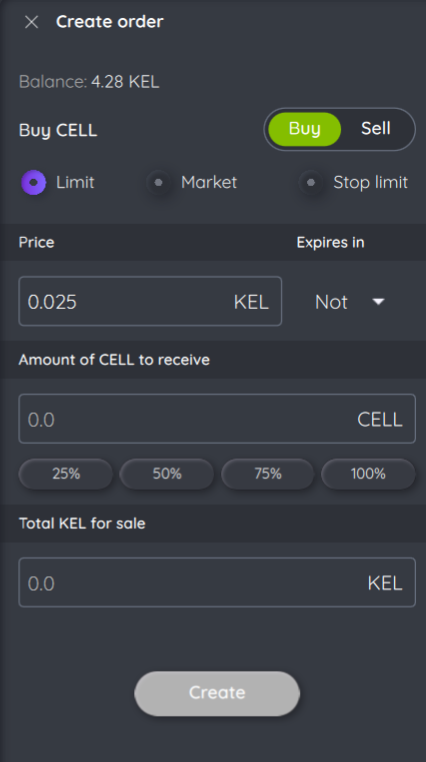
- Create exchange order (DEX tab)
Important
This manual is made for the Regular mode, information about Advanced mode will be provided in the end of the article
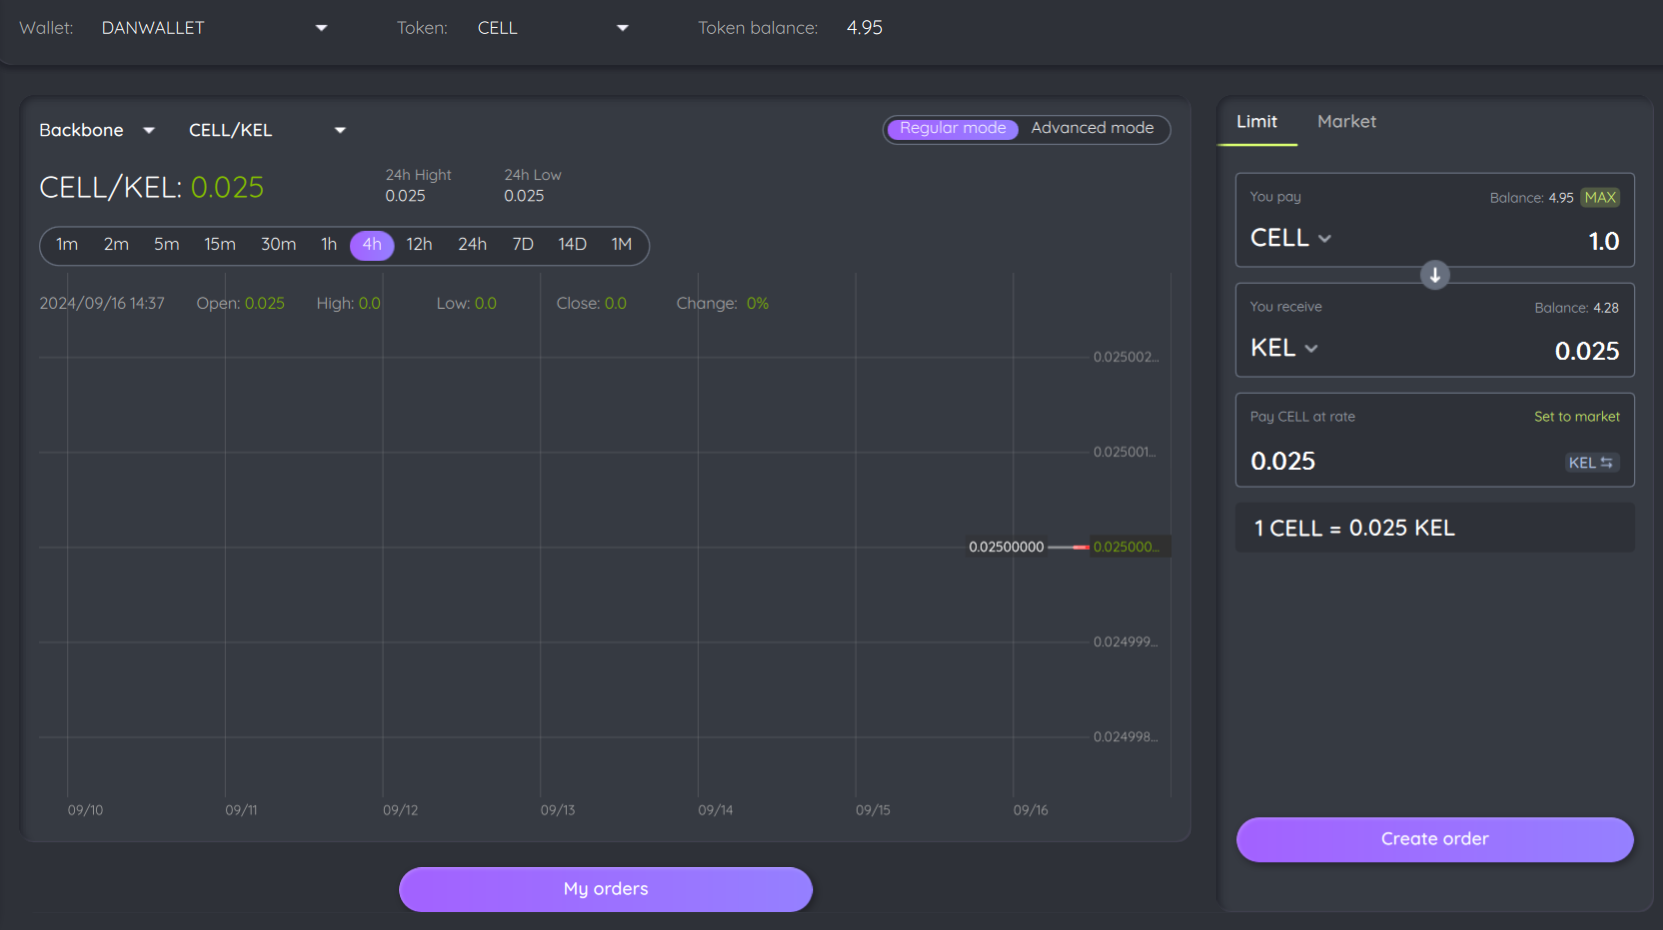
- Choose a network, where you want to exchange tokens (you must be connected to this network and your node must be fully synchronized with this network)
- Choose a token pair (token, which you want to sell, and the second one you want to buy)
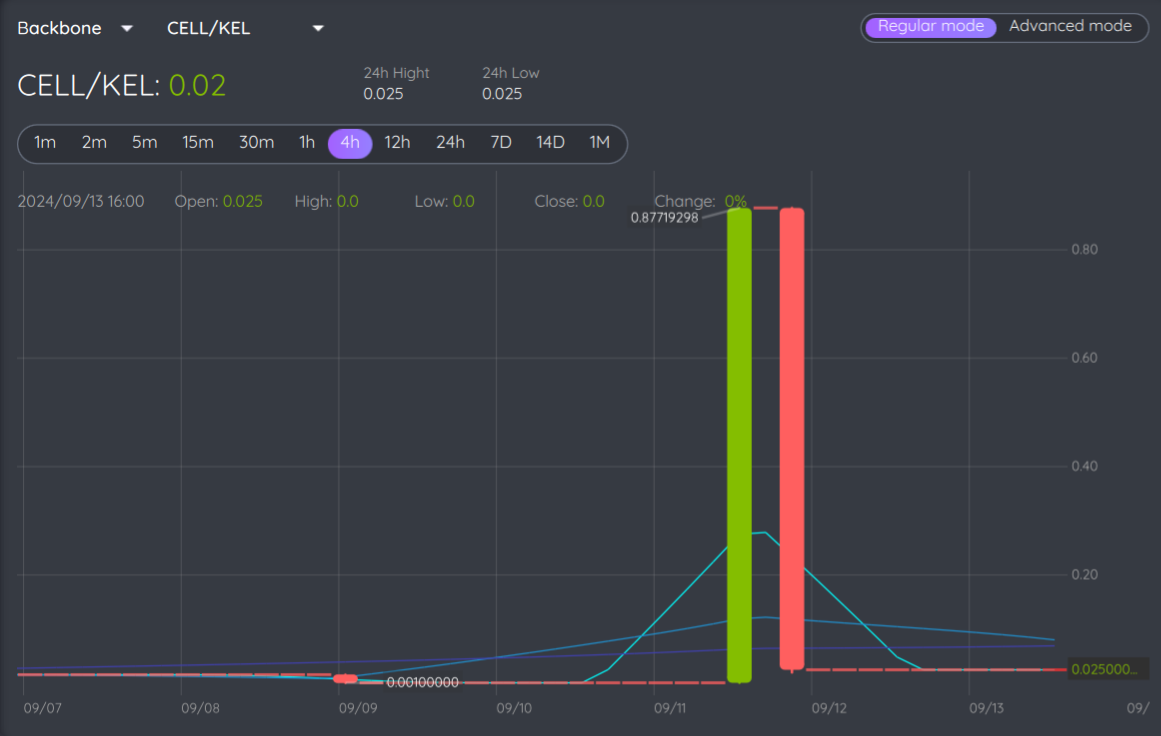
In this case, the Backbone network and CELL/KEL token pair were chosen.
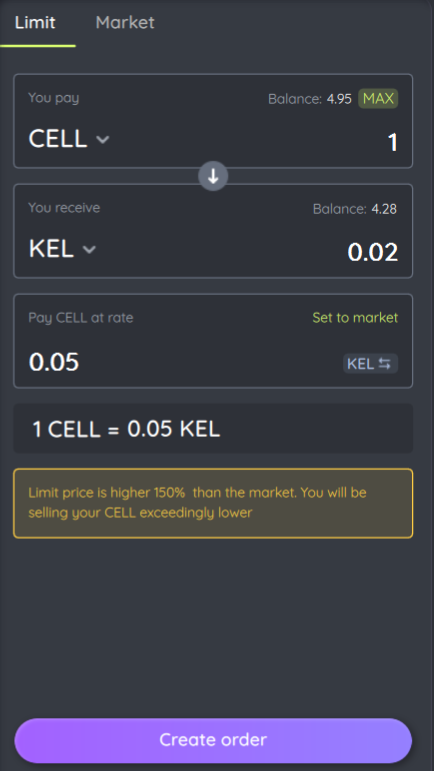
- Choose the order type (Limit or Market)
Limit order:
you choose the exchange rate for the token pair yourself, and the system will warn you if you are selling tokens too cheaply or too expensively relative to the market.
Market order:
the system itself automatically choose the most profitable rate for token pair.
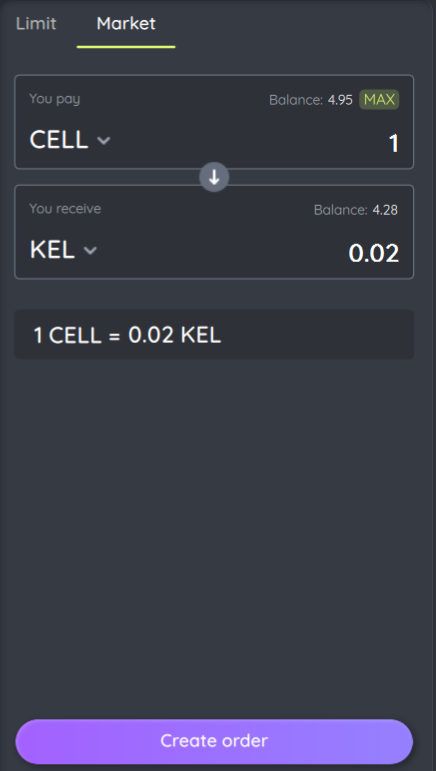
In both cases, you will be shown how many tokens you will send and how many you will receive.
After creating an order, your funds (amount specified in the order) will be locked, and after some time, the system will create an order to execute the trade.
- Wait for the order execution
Order payment will be processed through transaction, and the validator fee will be held. To view the order status, click the “My orders” button.
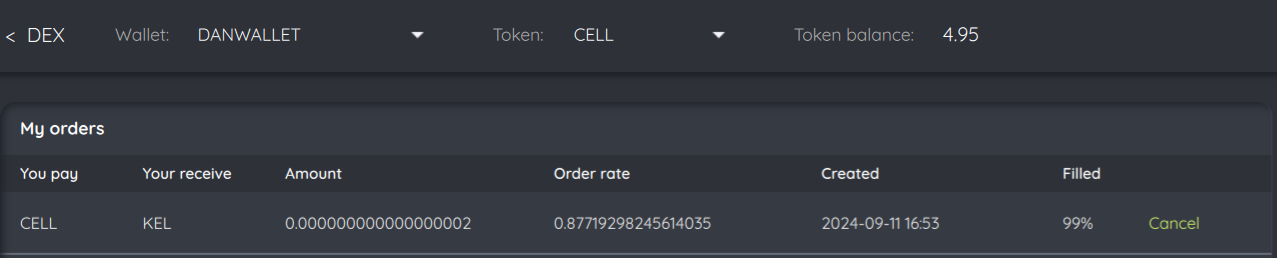
The order can be fully or partially executed. The example above shows that the order was executed at 99%. This means that you spent and received 99% of the funds specified in the order.
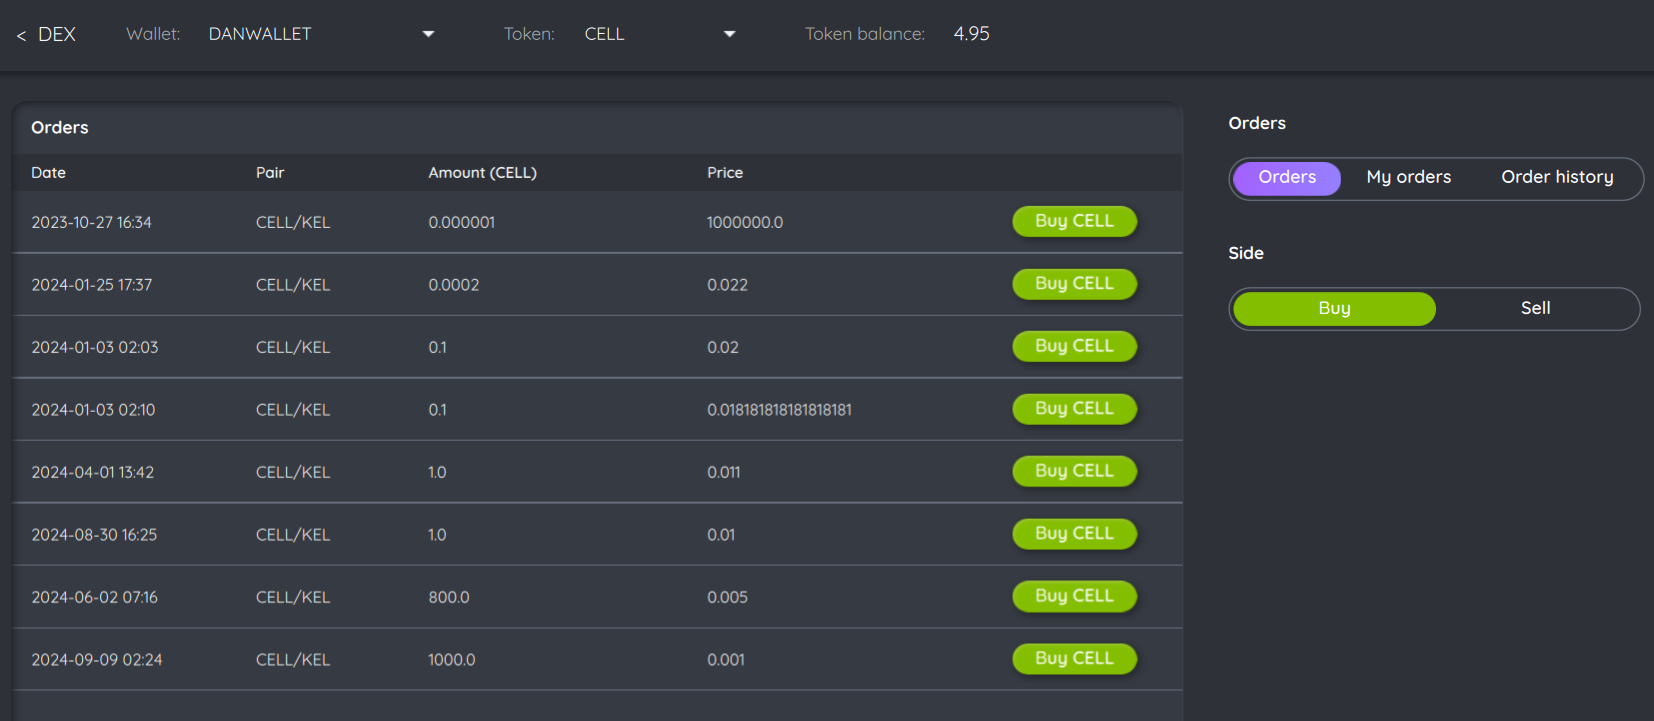
Now the wallet looks like this: initially, 7 CELL and 2 KEL were deposited into it. After the order was created, 2 CELL were withdrawn from the wallet. Then, as a result of the order execution, 2.28 KEL were transferred to the wallet. In addition, 0.05 CELL was spent on paying the commission for the conditional transaction. The current wallet balance is: 4.95 CELL and 4.28 KEL in the Backbone network
At this moment, user can’t specify expiration time of the order, so if order won’t be executed or needed, it has to be canceled manually.
Regular and Advanced modes
”Regular mode” includes two tabs, which afford to create limit or market order. Also, there is a “My orders” button which shows your actual orders.
“Advanced mode” offers more wide info about active orders on the exchange. It also illustrates the depth of the market as a table on the right (you can choose from 3 different views and value dimension).
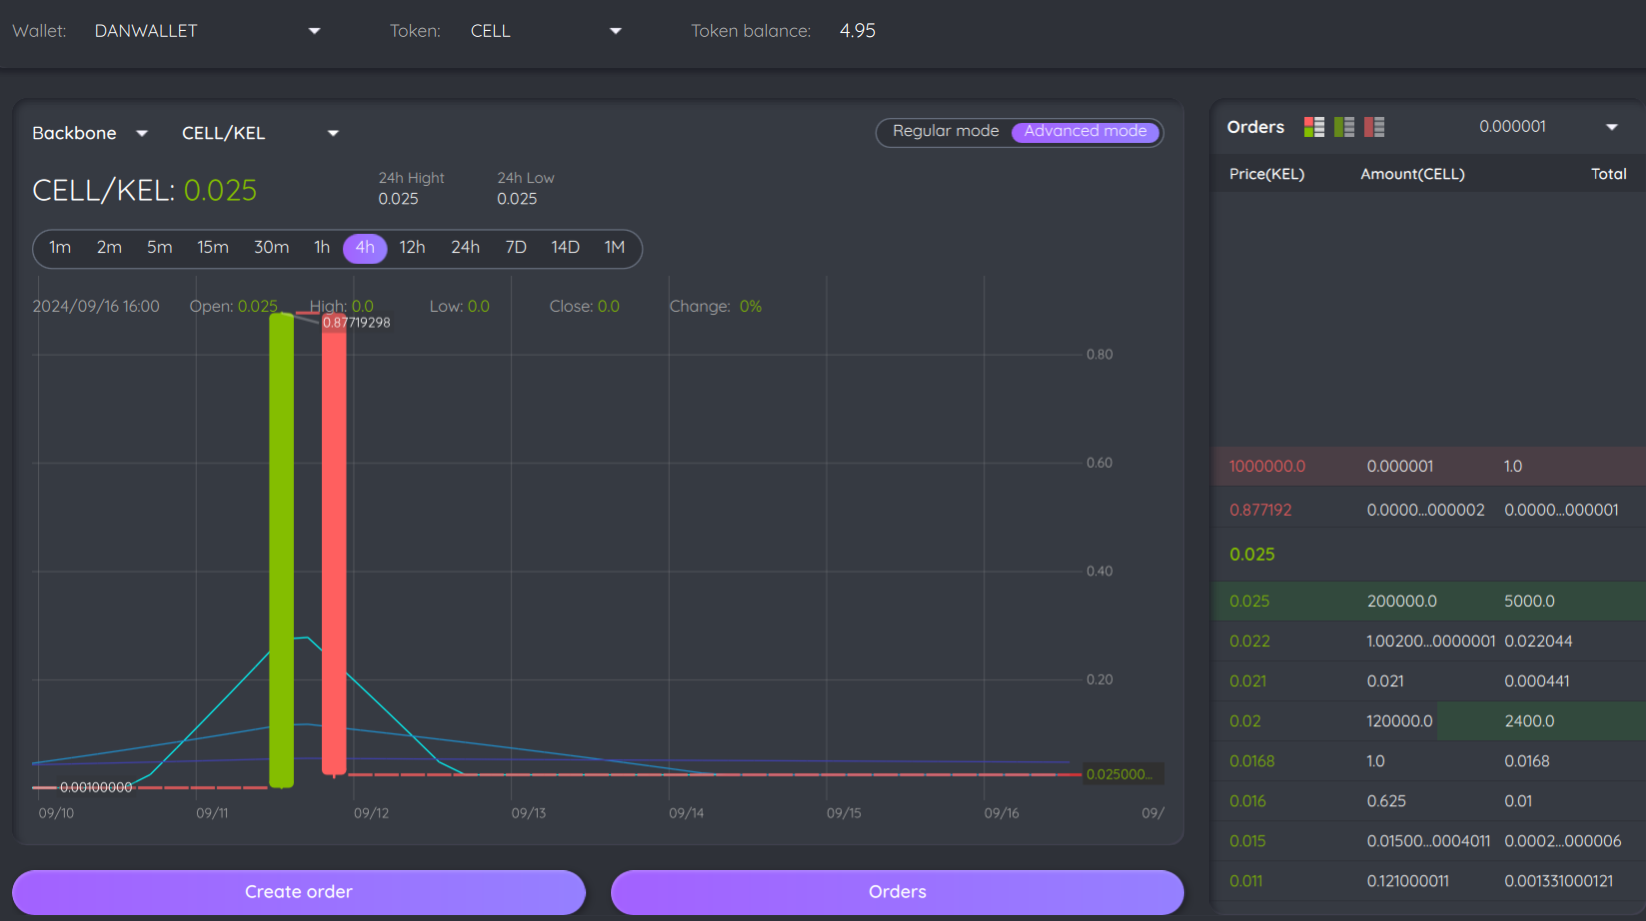
Tab “Orders” contains all actual orders for the specified network and token pair.
A button “Create order” in the “Advanced mode” allows to create more customizable order. But, for this moment, order format “Stop limit” is not implemented yet. Order expiration time “Expires in” is also can’t be chosen.